Beau the BEAUtiful horse

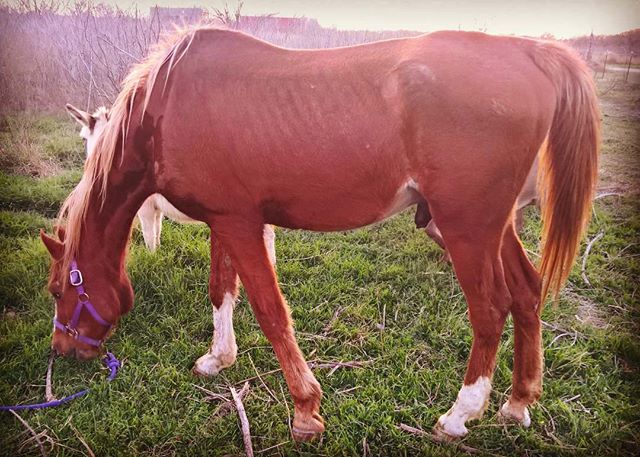
This Beau, our horse. One of Melissa’s friends from the homeschooling co-op had him and was looking for a new home for him, so we (we being the kids) said – with much glee – “We’ll take him!”

Beau is pretty tall. His shoulders are about 5′ tall, which horse people tell me is somewhere around 17 hands high. (I’m still learning all of this stuff. After all, I’ve only been a horse person for about 18 hours now.)

I have no idea about his heritage or breed, but we know he loves to go for rides. And, since he came with a bridle, lead, and saddle, we’re nearly set. We’ll be sure to post pictures of the kids roaming around the property on Beau.

Mosaic

When we remodeled the kitchen at our last house, we took out the tiny excuse for a pantry, and instead turned it into an alcove for the refrigerator. Except that the refrigerator was about an inch too wide to fit. So we took out the wall, turned the studs sideways, and slapped a sheet of plywood over it. Then, to cover the plywood, Melissa added a beautiful sunflower mosaic, made from leftover tiles and broken plates from Dollar Tree.

When we started the outdoor kitchen here at Livin’ The 10, we knew we wanted something unique. We also needed something weather-resistant on the back of the cabinets. We talked about several options, but quickly settled on doing a set of mosaics. Today, we started in on the first one.

Below, Melissa is buttering the outline for Chocolate the Donkey, who will be appearing in our Sunrise mosaic.

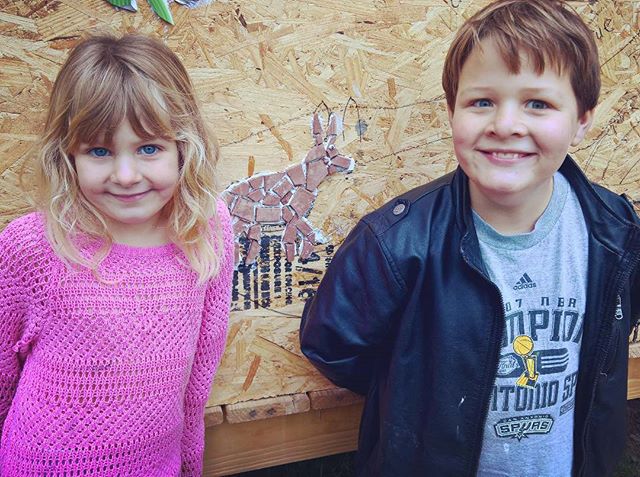
Eryk and Macy helped break up the tiles for Chocolate’s body from some scraps we had leftover from the top. Below, they’re showing off their handiwork.

Once Chocolate was set, we were off to the sunrise. If you’ve seen any of the sunrise photos from the blog, you know we have the most beautiful sunrises here at Livin’ The 10. Here’s Eryk setting some of the turquoise band…

And Iain helping out, too.

Iain looks just like me, but he acts just like Melissa. This photo makes me think of that television scene in Forest Gump….

Macy did her share as well.

It’s neat to watch your kids put together what amounts to a jigsaw puzzle without being able to see the final picture, and having to literally make up the pieces as you go along. They did a great job!


Mexican Pizza

These are reminiscent of my fast food days, and lunches at Taco Bell. That food was so bad for me, but these are not!

View the recipe on PepperPlate.com

This recipe is based on a copy cat Taco Bell Pizza recipe that I found. I made quite a few modifications in order to fit our dietary needs, so I have no problem claiming it as my own. If you are following THM, this would be an S.

YIELD 4 Pizzas
ACTIVE TIME 25 minutes
TOTAL TIME 35 minutes
CATEGORIES s, dinner, mexican, beef, beans

INGREDIENTS

1 lb ground beef (I use one pint jar of my canned ground beef, speeds things up)
1/2 teaspoon salt
1/4 teaspoon diced minced onion
1/4 teaspoon paprika
1 1/2 teaspoons chili powder
2 tablespoons water
2 Lavash breads (Joseph’s Lavash Bread – cheaper in the store, but here’s a link)
1 can refried beans
1/3 cup diced tomato
2/3 cup salsa or enchilada sauce (my favorite is the THM recipe book enchilada sauce)
1 cup shredded cheddar cheese
1 cup shredded monterey jack cheese
1/4 cup sliced black olives

INSTRUCTIONS

  1. Cook the ground beef over medium heat until brown, then drain.
  2. Return meat to pan and add the salt, onions, paprika, chili powder and water.
  3. Let mixture simmer over medium heat for 10 minutes, stirring often.
  4. Preheat deep fryer. Cut Lavash sheets in fourths.
  5. When oil is hot, fry each Lavash for about 30-45 seconds and drain on paper towels.
  6. Heat refried beans.
  7. Preheat oven to 400 degrees F.
  8. Stack each pizza by first spreading 1/3 C beans on one Lavash.
  9. Next add 1/3 C meat, then another Lavash.
  10. Top the second tortilla with 2 T of salsa.
  11. Divide the tomato, cheese, onions and olives evenly and top in that order.
  12. Bake for 8-12 minutes.

Herb Spiral

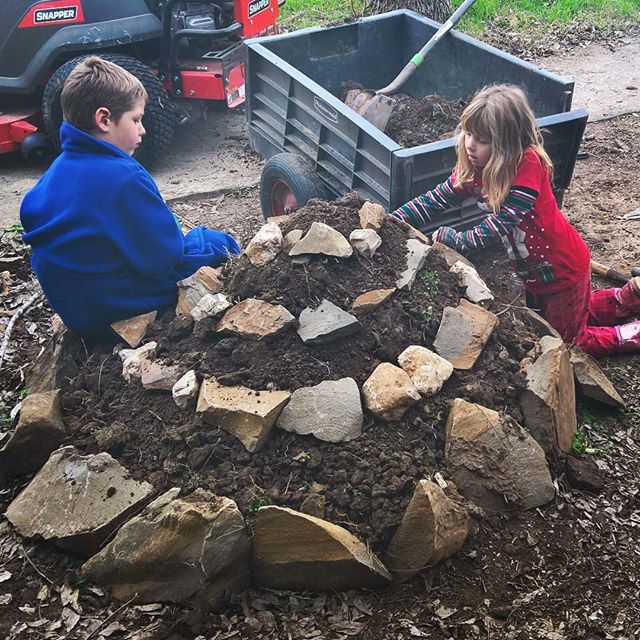
We have been working to try to build an herb spiral for several weeks, but it took us quite a while for us to actually get it finished. The concept inspired me, herbs where you are more likely to use them than if they are situated in a garden that requires shoes to get to. (Because let’s face it, sometimes I’d rather just leave the basil out than have to stop cooking and put my shoes on to retrieve it. Nothing beats the flavor of fresh herbs, except sometimes my laziness.) The elevation of the spiral makes harvesting easier, and utilizes a smaller footprint in the garden for more plants. For us, another bonus is that it is off the level of the land, which makes it more dog proof. Charlie loves to dig to find cool dirt to lay in in the summer time. I can’t tell you how many times he dug up my mint after I watered last year, and then lay on top of the poor upturned plants. I tried everything to keep him out of the gardens, but no luck. So I am anxious to see if he leaves this alone. So far, so good!

We seeded the spiral with basil, dill, and cilantro. We’ll post some pictures once it gets going so you can see the end results. If it works well, I may put several of them around the front porch, where we aren’t growing a lot of grass.

Donkey Hôte

As I’ve mentioned before, we have the most beautiful sunrises and sunsets here at Livin’ The 10.

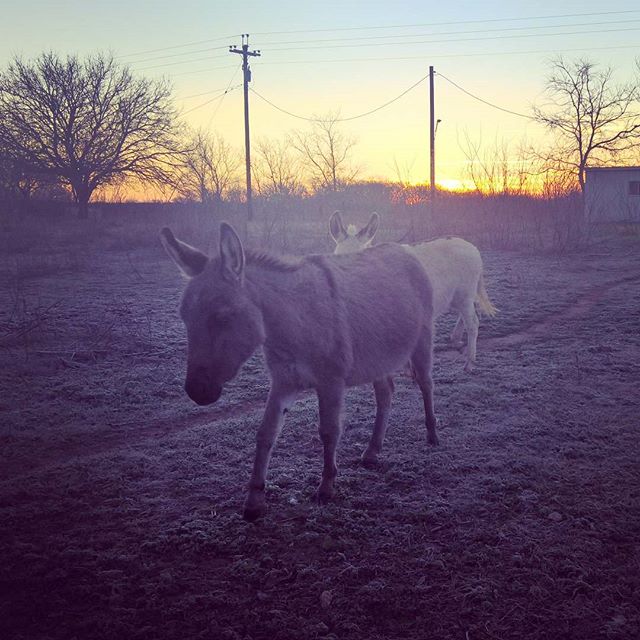
The other morning, I went for a short walk around one of the front paddocks, and along came Mocha and Chip, sauntering down the path from their barn over to the water. I snapped a quick picture of them in the frosty grass – right before they started harassing me for something to eat. They are nothing if not persistent!

All of the pictures in this post are sunrises.

Don’t have much commentary.

Just enjoy the sunrise photos.

Planning Tools

We like to be ready for unhappy circumstances before they happen. Being prepared for them makes them less traumatic, and makes it easier to get through them. We talked briefly about some of the things we’ve done to be prepared in the post about Livin’ The 9.5, where our water main burst.

One of the tools we use to help in prioritizing our preparations is a simple “What would it take” type exercise. For example, “What would it take…to have enough water if the water went out for…a day, a week, a month.” Answering those questions helps us find things we can do to position ourselves to be less dependent upon outside resources. Here’s a sample of one of our planning worksheets.

Scenario: Water Outage

Duration One Day One Week One Month
 Needs ~5 gallons drinking water

Animals should be OK – as long as reservoirs are kept 3/4 full

 ~35 gallons drinking water

~100 gallons for animals

~50 gallons for bathing

~20 gallons for dishes

 ~1000+ gallons drinking water

~400+ gallons for cleaning

Filtering system to reuse water for plants, etc.

 Preparations Store 10 gallons drinking water Store 200 gallons drinking water

Store 100 gallons for bathing, dishes, etc.

Berkey water filter

~1500 gallon water storage tanks

Rain catchment system

Pool

Water well, solar/air/hand pumps

Your numbers may be vastly different from ours. In fact, our numbers may (will) be vastly different as things change on our homestead. The point isn’t to get it perfect. Rather, the point is to take a stab at it. Even if you get it wrong, you’re still better prepared than you were before you even tried. Just make sure that the scenario you’re planning for is realistic. In other words, don’t plan for the Zombie Apocalypse. At least, don’t plan for the Zombie Apocalypse before you plan for a burst water pipe.

From the above table, we can put together a rough plan of action.

Phase I – Stupidly Simple

These are the things that, when you stop and think about it, are so obvious, that you could kick yourself for not doing it earlier.

  • Next time you’re at the grocery store, pick up 10 gallons of the $.60/gallon drinking water.
Phase II – Relatively Easy

These are the things that aren’t difficult, but may take some planning to do. For example, rather than go out and buy 300 gallons of water, we’re going to buy 10 gallons each time we go to the grocery store. Yes, it will take seven months to build up a stockpile, but in seven months, we can be better off than we are now…or not.

  • Add 10 gallons of drinking water to the grocery list for the next 30 weeks.
Phase III – A Little Effort

These are the things that are going to take a bit of time or money to do. As such, we’re going to have to plan for those more so than some of the others. For us, the Berkey falls into this category. And to make it easy, we’re going to spread the ~$300 cost into easy-to-do $20 chunks. Yes, it’s going to take three to four months to get there. But in three to four months, we can be better off than we are now…or not.

  • Save $20/week for 15 weeks to buy a Berkey (~$300).
Phase IV – Longer Term Planning

These are the things that are going to be significant investments of time or money – or both. We may need to finance some of these things. Alternatively, if we’re going to pay cash, it’s going to take a while to save it. For us, the water catchment, water storage, and water well all fall into these categories.

  • Research water catchment and natural filtration systems.
  • Research ponds as an alternative or supplement to water storage tanks.
  • Research pools and function stacking: entertainment, cooling in the summer, water storage in emergencies…
  • Research water well and pump costs.
Phase V – Git ‘er done

This is the “go do it” part of Phase IV. Don’t get stuck in never-ending analysis. At some point, you need to take action. For us, we’re still working through some of the Phase IV stuff, and here’s what our plan looks like so far.

Pool

We’ve decided that we’re going to put in an above-ground pool this spring. It will help with cooling-off in the summer months, and it will be a reserve water source if anything happens.

Water Filtration

With the outside kitchen build, we’ve decided that we’re going to put in a natural filtration system to reclaim the grey water from the outside sink and dishwasher. We’ll use that grey water for the herb garden area in the back yard. This will also give us some experience with natural filtration systems that we plan to apply later to larger scale projects.

Water Well

While we haven’t totally given up on a well, the $7,000 estimate from a local water well driller means that it has a ~12 year payback period – and that’s if it doesn’t cost anything to run the pumps. So for now, we’re focusing on other avenues for meeting water needs.

Catchment & Storage

We’re looking at three different options under the “catchment and storage” heading. They are, in no particular order

  • A “natural pool” pond system
  • Water storage tanks coupled with a rain and runoff catchment system
  • An aquaponic system

As I mentioned, these are longer-term projects. They each have their own benefits and drawbacks, and we haven’t yet figured out how we want to integrate them into our property. But that’s OK – we’re moving forward, and that’s the important thing.

Other Scenarios

We use the approach described above for assessing many of our “primary” systems. For example, when we first moved onto the property, we had some significant rehabbing to do on the old double-wide before we moved in. Parts were livable, but most of it wasn’t. So we lived in our pop-up camper for a month or so while we worked on the house. Longer term, we’re planning to build two or three B&B cabins around the property. While their primary purpose will be revenue from B&B activities, if anything should happen to our main home, we’ll have backup systems readily available.
 

Math: Simple Static Addition

What is static addition? Quite simply, it is the addition process that does not require carrying. When starting structured mathematics lessons, barring counting, the first and most basic lesson is static addition. The easiest way to teach addition in a concrete fashion is using counting bears, or Cheerios, or M&M’s, or any other small objects with which small groupings can be combined to demonstrate the addition process. A bead frame, or abacus, is another method for doing this. I had never used an abacus before learning Montessori techniques (a licensed degreed math teacher!), and I regret that I waited so long to learn the benefits of using one.  In addition to aiding in the addition process, it also reinforces knowledge of place value. The small Montessori bead frame can be utilized for numbers up to 10,000, but the larger bead frames that we use go up to 1 billion.

The great thing about the bead frames is once you learn how to use them on a small scale, performing operations on a larger scale is just as easy, children can add and subtract numbers with 10 places very quickly and with great ease. Basically, each strand of the bead frame represents each place value, with the top being units, the second strand down representing the tens place, the third down the hundreds place, and so forth. So the number 317 is shown on the bead frame by moving 7 beads on the top row, 1 on the second row, and 3 on the third row. when adding a number, for example, 42, you would simply slide 2 beads over to join the 7 on the units strand, and slide 4 beads over to join the 1 on the tens strand. For a video on presenting the bead frame as a lesson, watch this. Here are the kids in action.

Macy is working with the small bead frame. This was her first lesson, and she picked it up very easily.

Here is a video of Eryk demonstrating static subtraction…

And here’s Iain demonstrating static addition, the only difference is that the beads move the opposite way.

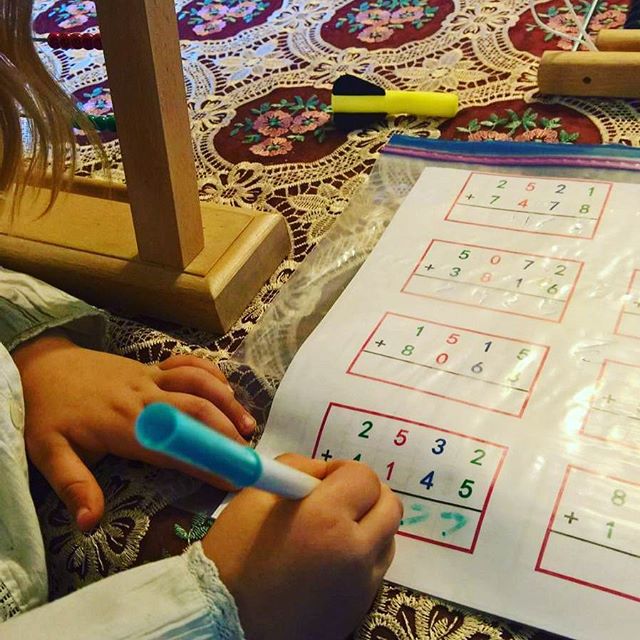
I had the bright idea to put my class set of math practice cards in a gallon ziplock bag to create an erasable marker board for them to work with. These problems are created such that they aren’t going to remember the answers, so they can work the same set of problems (there are 4 pages, 2 each of addition and subtraction) until they have mastered the process. Eryk already has, and has moved on, Iain is still working on his speed and fluidity, and Macy has only just begun the process.